

1. Download the resource
The first step is to download the resource that you purchased. You can find the text file with the download link on your order page or email.
Once you have downloaded the text file, open it, copy and paste the download link in to a browser and download it from the Google Drive.

2. Extract the resource
When you have downloaded the resource, you will need to extract it to a folder on your computer. All our resources come in a compressed format like .zip or .rar, and will need to be extracted using a tool such as 7-Zip or WinRAR.

3. Upload the resource to your server
Local Host:
Drag and drop the resource in to your server's "resources" folder.
Server Hosted Online:
You will need to upload the resource to your server. You can do this using a tool such as FTP (File Transfer Protocol). There are many FTP clients available, the most popular being FileZilla or WinSCP, which you can use to connect to your server and transfer files.
Connect to your server using FTP, and navigate to the server-data/resources folder. This is where you will need to upload the car pack. Simply drag the car pack folder from your computer into the resources folder on the server.
4. Add the resource to the server config
After putting the resource inside the "resources" folder, you will need to add it to start with the server. To do this, open the server.cfg file, which is located in the server-data folder. It can be opened using any text editor like Notepad, Notepad++ or Visual Studio Code.
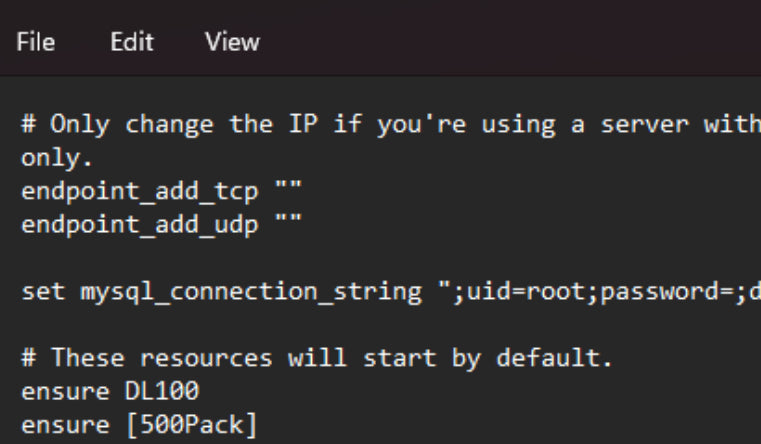
Near the top of this file, you will see a section for resources. Add the name of the resource to this section, like this:
# These resources will start by default.
ensure PackName
Replace "PackName" with the folder name of your pack. For example, if your car pack folder's name is DL100, you should add it as "ensure DL100".
If it is a pack that consists of multiple resource files, it will have square brackets on both sides of the resource's name, for example [500Pack]. Then you need to add it as "ensure [500Pack]", exactly as the folder is named.
Note that you should ONLY add brackets to the folder's name if it has multiple resource folders inside it.
You can then save and close the server.cfg file.

5. Restart the server
Finally, you will need to restart the server in order for the changes to take effect. You can do this by using the restart command in the server console, or by stopping and starting the server using your hosting provider's control panel.
That's it! Your resource is now installed and ready to be used on your FiveM server. If you have any issues, encounter any errors during the process, or need any help, don't hesitate to open a ticket on Discord:
